Friday, July 17, 2015

Zucchini Cookies...The Most Correct Way to Eat Vegetables

I picked three zucchinis from my garden this week while I was out looking at the progress on my cucumbers.  This is the most successful garden we've had in the time we've lived here.  We relocated it from the east side of the property, where it wasn't getting enough sun exposure.  We also cut the size of it in half.
I have no gardening experience.  I can barely buy vegetables.  My father-in-law would have survived in Colonial 'Merica with his sweet gardening capabilities.  They would have thrown me overboard somewhere in the Atlantic.
I bought six different veggies to plant. Four made the cut; I did not have room in my raised bed for squash or melon.  As it is, the cucumbers have totally wrapped themselves all over the rest of their neighbors (sorry, peppers.)
I've been watching the zucchini blossoms and cucumber blossoms.  Then, all of a sudden, BOOM.  There are cucumbers.  It's been so awesome to see them grow.  And I thought nothing was doing on the zucchini plant...but I was looking in the wrong place.  If I was an animal, I'd die off because I wouldn't be able to find the vegetables in the garden.  The zucchinis are nestled at the bottom of the plant.  Nice diversion.
So, to put those lil zuccs to good use, I thought I'd go sweet with them.  Sure, zucchini boats stuffed with sausage and cheese is all the Pinterest rage, but I say, buck that.  Also, these were a little too small to put filling into (in my opinion.  Who wants a measly amount of stuffing?  In those recipes, the zucchini is just an edible plate.)  If I can reap some bigger zucchinis, I will try them stuffed.  But for now, we add chocolate!
This recipe comes from the Food Network.  The dough is more like scoopable brownie batter than chocolate chip cookie dough.  Nothing wrong with that; just making it known so you don't get the same confused look I did when everything was put together and it looked loosey goosey.  It'll hold.

It thickens up by the second or third sheet...


Before you begin, have everything measured, shredded, melted.  It's easier than having to stop in the middle of mixing to measure, shred, and melt.  You'll also need either parchment paper or silicone baking mats for your cookie sheets.

3/4 c. flour
1/2 tsp. baking powder
1/2 tsp. salt
8 oz chocolate (original recipe calls for semi-sweet; I used 4 oz German chocolate and 4 oz semi-sweet because that's what I had on hand)
6 oz butter (that's 1 1/2 sticks)
2 eggs
2/3 c. sugar
1 tsp. vanilla
1 c. chopped walnuts (or nut of your choice, or no nuts if you're not down for nuts)
1 c. chocolate chips
1 c. grated zucchini (1 1/2 of my zucchinis equaled 1c.)

Things to do beforehand:  grate your zucchini, melt your 8 oz of chocolate with your 6 oz of butter on the stovetop, chop your walnuts.

In a small bowl, combine flour with baking powder and salt.  Set aside.  In a large bowl, beat the eggs and sugar for 4 minutes with a mixer on medium-high speed.  Beat in the melted chocolate and vanilla, then add in the flour mixture, walnuts, chocolate chips, and zucchini.

Drop spoonfuls two inches apart onto paper/silicone lined cookie sheets and bake at 350 for 15 minutes.
Give em room!
Let the cookies cool for 5 minutes on the cookie sheet and then move to a wire rack to cool completely.

First sheet out of the oven...minus one...I had to make sure they were good enough to blog about...
I think you could easily throw this batter into a 9x9 pan and bake them like brownies. They taste like that. They also taste like I had three before this blog was finished.  It's cause I wanted to make sure I ingested my daily intake of zucchini.

Bake and enjoy!!

Saturday, July 4, 2015

Reese's Ice Cream Cake


The best time to try to make an ice cream cake is when it's 77 degrees outside and your kitchen is on the second floor of your house.  Take my word for it.
Trust me--I succeeded.  You can, too.  This is very easy, and much cheaper than the beloved, tasteless DQ cakes that pop out during summer birthdays and other celebrations.  You don't even have to wear extremely short shorts and look disdainfully at everyone to make it, but you can if you want.
I used my leftover hot fudge from the peanut butter pie I made earlier in the week for my husband's birthday.  This cake is also for his birthday.  My goal is to make him heavy enough that he can't run from me.  Soon.
Feel free to go store-bought on all the ingredients.  If you make your own ice cream sandwiches, use em, and tell me how you get that kind of free time.

Ingredients:

18 ice cream sandwiches (Much as I hate the Walmart, they have quite the selection of ice cream sandwich flavors.  I picked a chocolate/vanilla hybrid.)
1 cup peanut butter, nearly melted
Hot fudge/Hot sauce (original recipe said 6 tablespoons, but I forbid you to measure this)
Caramel sauce (same forbidding here, as well)
12 Reese's cups, chopped (that's one package of 6 two packs...it sounds like common core math, I know, but they're right in the candy aisle)
Cool Whip (I used one of the big tubs o'Whip, but you just use how much you want.  I won't know unless I'm there eating it)

If you have a nice, long serving plate, assemble and serve it on that.  Can you believe I don't?  I sure don't.  So I assembled mine and it will be served on a cookie sheet.  We ain't fancy folk.  We want cake to mouth by any means necessary.

So, prep is best in assembling this cake.  Chop the cups up, melt the peanut butter (30ish seconds should do), and make sure the Cool Whip is thawed.  When you are ready:

Lay 6 sammiches out (3 across/2 down)
Spread half of the peanut butter on the sammiches
Spread 4 chopped cups evenly over the peanut butter
Drizzle hot fudge and caramel over cups
Lay another 6 sammiches on top of that, pressing a bit to make even
Spread other half of melted peanut butter on sammiches
Spread 4 chopped cups evenly over the peanut butter
Drizzle hot fudge and caramel over cups
Lay last 6 sammiches on top
Frost with Cool Whip


 This is about what yours will look like in the Cool Whip frosting step.  Ooey, gooey goodness, I say!


What I like to call the Cavities Shot.  Always trying to drum up business.  Tell my boss.

Make sure to check hand and forearm for stray peanut butter, hot fudge, and caramel splotches.  Those are best licked off at the end as a reward for sweet, sweet assemblage without melting it all.

Do I need to mention that you must keep this bad boy frozen (Let it gooooooo!  Let it gooooo!) until you serve it, and then put it back in the freezer, should any remain? Ok then.

I'm so very excited to try to transport this the 10 minutes it takes to get to my folks house.  This is when I will praise the lead foot that my husband bought on e-Bay.

Assemble and enjoy!!!

Saturday, January 24, 2015

Angel Biscuits...Go yeast!

I have not been overly successful in biscuit-making.  I love big biscuits and mine don't reach that puffiness that constitutes a fantastic biscuit. 

I also love yeast rolls. Clearly. So these Angel Biscuits are a sweet hybrid. This recipe comes from the cookbook Home Baked Comfort, but I bet you have a similar one in any of the the 200 cookbooks you have in your kitchen. Or the three. Maybe I just have 200. 

Here we go:

1 pkg active dry yeast
1 tsp sugar, plus a pinch
1/4 c warm water (110 degrees)
3 c flour
2 tsp baking powder
1/2 tsp baking soda
1 tsp salt
6 Tbsp frozen unsalted butter
2 Tbsp melted butter
1/4 c cold shortening
1 c plus 2 Tbsp buttermilk

In a small bowl, dissolve yeast in the water with a pinch of sugar. Let stand 10 minutes. 

In a large bowl, combine flour, baking powder, soda, salt, and sugar. With a large holes shredder, grate the butter into the flour mixture. Add in the shortening and mix together with your hands until you see crumbly chunks of butter and shortening. Pour in buttermilk and yeast and stir until mix is just combined. 
Dump the dough onto a lightly floured surface and press into a disk 3/4 inch thick. Cut out biscuits and re-roll scraps as needed. Cover loosely with plastic wrap and let sit for an hour, then refrigerate for at least two hours. 
Preheat oven to 400. Brush biscuits with melted butter and bake 18-20 minutes or until golden brown. Devour.

That last step is the most important. 

Thursday, August 14, 2014

¡Fauxolé!

This is such a great end-of-the-week meal because it's so easy and can be a much healthier alternative to Chinese or pizza when you just want to get home to veg out the start of the weekend. 

My recipe is very easy to adapt. Use ground beef/chicken/turkey/fake meat instead of shredded chicken. Try shredded pork. Add any number of chopped veggies to the mix. Add a couple different kinds of beans. Whatever you like (or you want to trick your husband/kids into eating.)

Easy Mexican Chicken Pie

1 tube crescent rolls
1 rotisserie chicken (or meat of your choosing...about a 1lb worth)
1 packet taco seasoning
1 can red kidney beans
1 can corn
Shredded Mexican cheese
Sour cream

Preheat the oven to 375. Lay crescent rolls out in a pie plate, short ends out, fat ends in the bottom of the plate. 
Ina large frying pan, put taco seasoning and 2/3 cup of water and turn heat to medium. Shred the chicken, drain the corn and beans, and add all to the seasoning. Mix and cook until liquid is bubbling. Add a handful of cheese and pour into pie plate. Fold short ends into center and sprinkle with cheese. Bake 15 minutes or until browned. Serve with sour cream. 


Jalapeños, green salad, tortilla chips...there are many additions that could be made! Enjoy!!! 

Sunday, June 29, 2014

Martha Stewart's Blueberry Muffins....Level: Unintimidating

If you've never baked from a Martha recipe, this is an easy one to try.  She hasn't recommended that you forge your own muffin tins out of metal (though my father-in-law could totally make me some...birthday present!) or mill your own flour for this recipe.  I bet you have all the ingredients on hand.  I did. 
Take your stick of butter out about 10 minutes before you start prepping for this recipe.  You want to be able to leave an indent in the butter, but not have it be too soft or melty.  In the warm temps like we have now (or if you have a second floor kitchen, as I do) you may need to watch it, as it will likely be softer sooner.

1 stick of unsalted butter, at room temperature
2 cups all purpose flour
1 1/2 teaspoon baking powder
1/2 teaspoon salt
2 cups fresh blueberries (I used a pint...I didn't bother to measure and I don't know if it's equal, but I was happy with blueberry/muffin ratio)
1 cup sugar (plus a tablespoon extra for sprinkling over the tops of the unbaked muffins)
2 eggs
2 teaspoons vanilla
1/2 cup milk

Preheat oven to 375.  Grease a 12 cup muffin tin (MS says to grease and flour, so whatever you feel down with doing is fine.  I was in spray-mode this morning.)
Whisk the flour, powder, and salt together in a medium bowl. Put the berries in a mesh strainer over the flour and sprinkle some flour mix over the blueberries and shake to coat.  Set it all aside.
Cream butter and sugar together until light and fluffy (about 3 minutes.  I used my KitchenAid.  Go with what you got.  KitchenArm or KitchenHandMixer is fine, too.)  Add eggs, one at a time.  Splash in vanilla.  At the lowest speed, add in the flour and mix until just combined.  Do the same with the milk.  Fold in the blueberries with a spatula.  Divide batter among the muffin tin, sprinkle the tops with a little sugar and bake for about 30 minutes, or until a cake tester comes out clean.  Rotate the pan halfway through the cooking time.  (Good MS tip!)
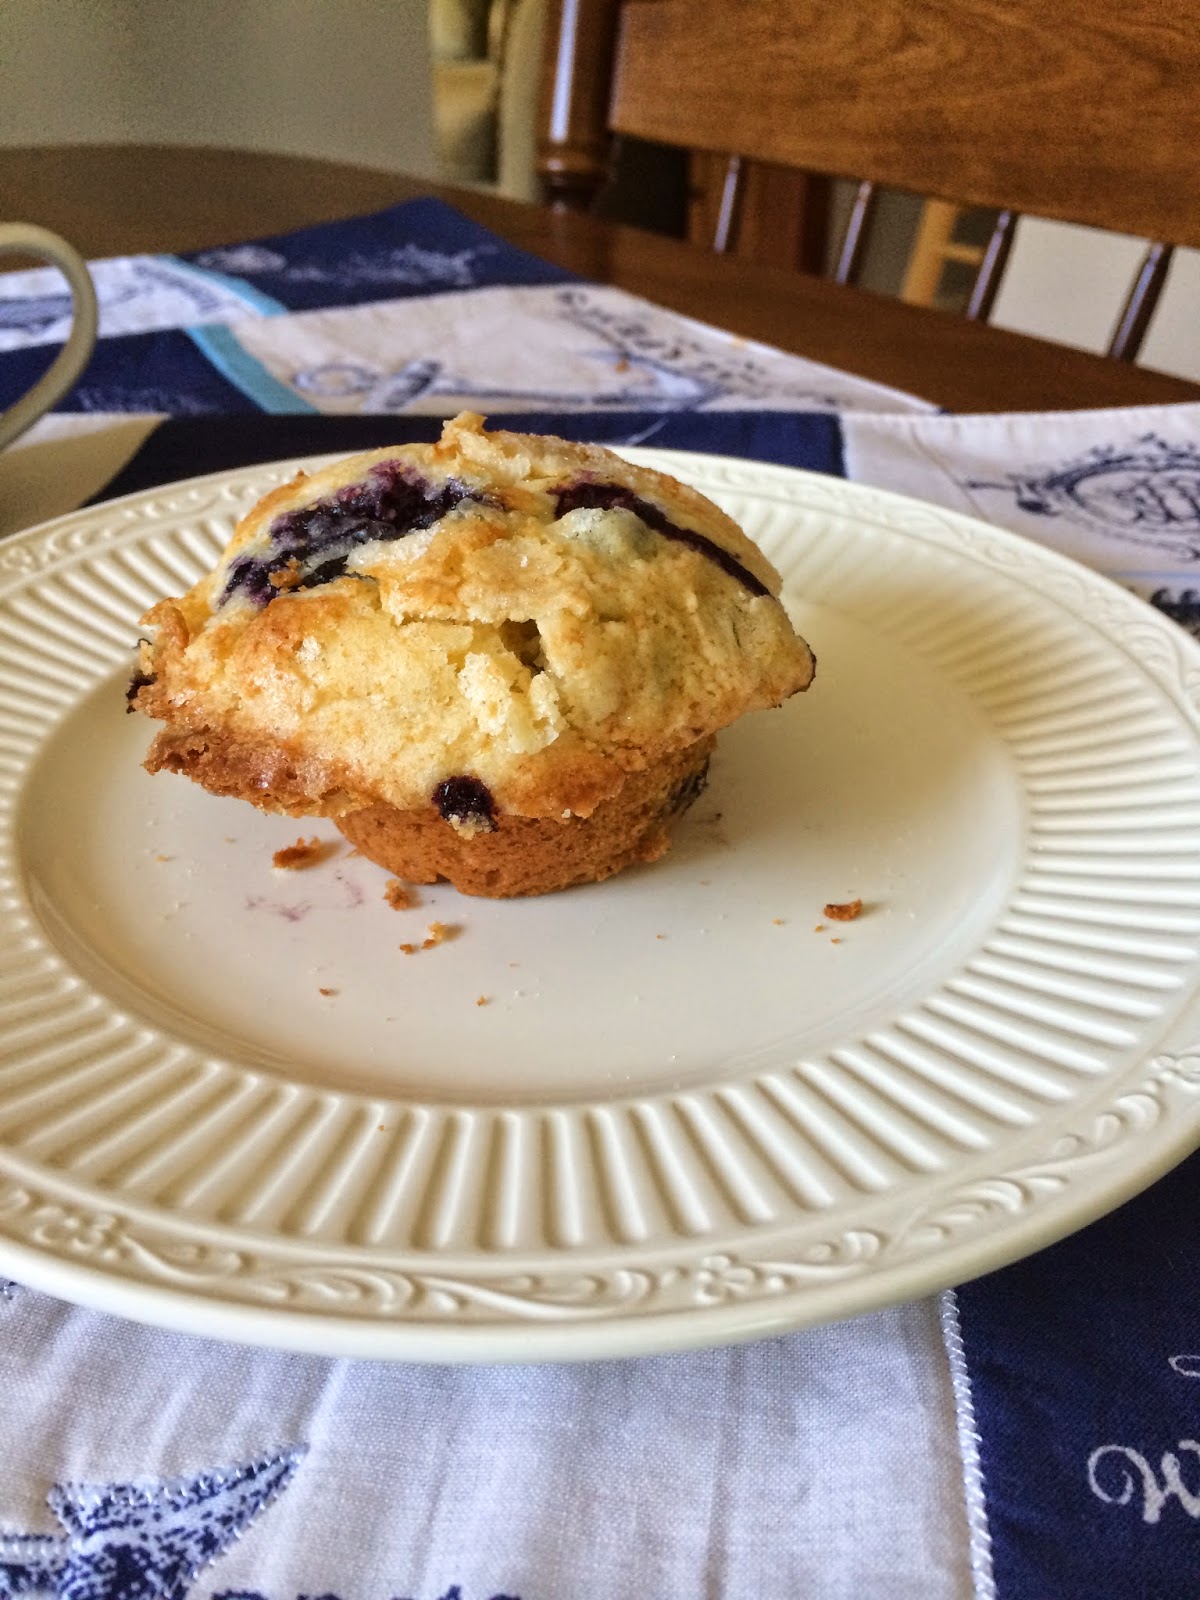
Let cool on a wire rack for 10 minutes and then knife those bad boys out and serve to your happy husband waiting in the other room with hot coffee and butter or cream cheese (or one of each, cause that's how he's feeling today!)

It cures everything but a Monday morning...

Friday, February 14, 2014

Coconut Shrimp

This recipe is so easy and works up quick in batches. Sam's Club sells frozen, uncooked peeled and deveined shrimp, leaving you to just thaw and gather ingredients. This recipe was adapted from Betty Crocker and the Joy of Cooking. 
Here we go:
1 lb peeled and deveined shrimp, uncooked and thawed
1/2 c apricot preserves
2 tsp. cider vinegar
3/4 tsp. pepper flakes 
1/2 c. Bisquick
1 egg
1/4 c. Milk (plus an extra splash, if needed)
1/2 tsp. cayenne pepper
2 c. Coconut
1 c. Panko breadcrumbs (I used lemon pepper flavored as I had that on hand. Use what you have)
1 cup oil

Mix preserves, pepper flakes, and vinegar and set aside. 
Pat dry the shrimp. Heat the oil in a large skillet. Mix the coconut and breadcrumbs in a shallow dish. In another shallow dish, mix egg, cayenne, Bisquick and milk, adding a little extra if necessary to make batter moveable (that's official speak.)
Dip shrimp in batter then in coconut mix and fry 3-4 mins, turning halfway through, until shrimp is cooked and coating is browned. Heat apricot sauce in microwave for a minute and serve over shrimp. 

I kept the tails on the shrimp which made it easy to dip, coat, and turn. We ate ours with rice and smiles. This would make a lovely valentine dinner. Looks tough but is easy and delicious!

Monday, January 27, 2014

Blondies Have More Fun

Found this book at Mardens this weekend:


16 bucks, bub! Heck of a deal for a cookbook. Of course I read it cover to cover. Then went through to find the first recipe for which I had all the ingredients. I landed on blondies. Her recipe is not for albino brownies. These are squares of chocolate chip cookies, soft and delicious, without the pan work and wait time of their round sibling (hey, I'm a round sibling...).  The other great thing is that it takes about half the ingredients of a chocolate chip cookie recipe. Which is good when you're craving a snacktreat but don't have all the goods to produce them. Here we go:

10 tablespoons butter
1 c packed brown sugar
2 tsp vanilla
1 egg
1 1/4 c flour
3/4 tsp baking powder
1/4 tsp salt
1 c chocolate chips

Grease and flour 9x9 pan. Preheat oven to 350. Cream butter and sugar. Mix in egg and vanilla. Add dry ingredients and stir to combine. Stir in chips. Press into pan and bake about 30 mins or until light golden brown. Cool in pan. Cut into 9 or 16 squares. 

Took a whole bunch of self control but I cut mine into 16. Doesn't mean I only ate one!


Doesn't mean I couldn't eat two bites before I snapped a picture!

Happy baking, bub!

Friday, January 17, 2014

Artichoke Dip


1 cup mayo
1 cup sour cream, softened
1 pkg cream cheese
2 cloves garlic, minced
Good shake of dill
1 can artichoke hearts, choked dry and chopped fine
5 oz Parmesan cheese (not the sawdust stuff)

Mix first five ingredients with a hand mixer. Add in cheese and artichokes and mix by hand. Bake at 375 till brown, about 25 minutes. Be loved by your guests. 

Tuesday, October 29, 2013

Cranberry Pie and a return to normalcy

Logging in, I saw that my last entry was made on the day of Andrew's accident. Eerie. It's been three months and I didn't think we'd be home. I didn't think Andrew would be as independent as he is. I didn't think we'd be slowly returning to our old/new life. What better way to fall back into our old routines than by cooking. We've had lots of home cooked meals (and lots of pizzas from Tradewinds, not gonna lie) but this Nantucket Cranberry Pie is amazing. I love chocolate more than my cats, but I would gladly have a slice of this over a slice of chocolate pie. The top is so buttery and the cranberries are just tart enough to cut through the richness. That's why cranberry sauce is so good at Thanksgiving...it cuts through the dopamine and gives you a second wind for pumpkin pie.

So this recipe comes from The Pioneer Woman.  It's easy.  If you didn't get fresh cranberries from your Cat Whisperer, buy a bag of Ocean Spray (buy two...you'll make this again.)

2 cups cranberries
3/4 cup pecans, chopped
2/3 cup sugar
1 cup flour
1 cup sugar
2 eggs, lightly beaten
1 stick butter, melted
1 teaspoon vanilla (her recipe called for almond extract but I couldn't find it in my haze of spices)
1/4 teaspoon salt
1 Tablespoon sugar

Preheat oven to 350. Grease or spray pie plate. Add cranberries. Sprinkle with nuts and then sprinkle with the 2/3 cup of sugar. In a mixing bowl, combine the remaining ingredients (minus the tablespoon of sugar) and stir gently to combine. Pour over the cranberries and lightly spread to cover. Bake 45-50 minutes, sprinkling that last tablespoon of sugar over the top of the pie 5 minutes before the pie comes out of the oven.


Look at the pie!  Make the pie! Eat the pie!

Wednesday, July 17, 2013

DIY Iced Coffee

I am very fortunate.  I have a husband that caters to (nearly) every whim that I have (especially if he's to get something from it.)  He indulged me with half a pound of mocha flavored coffee from "in-town" and I was set to use it to make PW's iced coffee recipe.  When I got home to re-read the recipe, I realized that I did not have the containers large enough to make her intended recipe.  So we cut the recipe in half, and I saved the mocha coffee to make for next time (in case it turned out junky.)  Had to just try it out with our plain old DD coffee.  I am very fortunate to have a box of that in our spare bedroom.  Call it my baby.

Original recipe is found here.

Here we go:

1/2 pound good coffee (you could probably make this with Folger's...if you have no taste buds.  Not judging...it's hot and I'm cranky, is all.)
4 quarts cold water
Large enough container with lid to hold 4 qts water and coffee grounds (I used my dutch oven)
Fine mesh strainer
Cheesecloth
Something to store the coffee in that will fit in your fridge(with a spout or a big old juice container)

Dump the 1/2 pound ground coffee into your large container.  Add the cold water and stir to make sure all the grounds are wet.  Let sit at room temperature overnight (12-24 hours...mine went for like 28.)
Strain the grounds and coffee over the cheesecloth lined strainer into the fridge container.  Press on the grounds lightly to make sure you get all the coffee.
Chill in the fridge and serve how you like!

C'mon over!  It's freakin hot today and I have half and half!
 My BEAUTIFUL coffee dispenser is courtesy of my BEAUTIFUL friend Melissa.  It was given to me, along with matching glasses, as a bridal shower gift.  Ten months later, I'm finding a fabulous use for it!  The container and glasses are hand-painted.  I told you I was fortunate!

Saturday, June 29, 2013

If You're Happy and You Know It, Eat Some Carbs

Summer suppers at our house are usually some sort of grilled protein and a salad.  It's too hot to consider much else (and cooking roles reverse, with Andrew on the grill and me on chop chop duty.) 

But yesterday was all rainy and junky, so chili and biscuits were on order.  My great uncle Jon's chili recipe nearly serves all of Clifton...I improvised it down to half that and still had a large dutch oven full.

Because the biscuits were a spur of the moment idea, I needed to find a non-buttermilk recipe.  If you don't have buttermilk, you can add 1 tablespoon of vinegar to 1 c of milk, but the recipe I found needed 1 1/4 c buttermilk (and my brain doesn't work well with maths.) 

Thank goodness for the bridal edition of the Better Homes and Gardens cookbook.  They have a non-buttermilk recipe (plus a drop biscuit and buttermilk biscuit variety).  All ingredients were on hand, so it was on!

Biscuits:

3 c. flour
1 Tbsp. baking powder
1 Tbsp. sugar
1 tsp. salt
3/4 tsp. cream of tartar
1 stick butter, cold, cut into pieces
1/4 c. shortening
1 c. milk

Preheat oven to 450.  Mix the dry ingredients together.  Cut in the butter and shortening until it resembles coarse crumbs.  Form a well in center of mix and pour in milk.  Stir with a fork until just combined.  Turn out dough onto lightly floured surface and knead dough by folding and gently pressing until dough holds together.  Pat or roll out to 3/4 inch thickness.  Cut dough with biscuit cutter and re-roll and cut scraps.  Bake on an ungreased cookie sheet 10-14 minutes or until golden. 

Golden.  And delicious.  I'm surprised we have any left!

Serve warm.  Like I needed to tell you that.  Make these.  Put Pillsbury out of business.  They were foolishly easy.  I'm pretty sure Shakespeare said "a warm biscuit doth a happy husband make."


Friday, June 7, 2013

Freddy Kruger Russian Roulette Sugar Free Blueberry Pie

Sure, it's a long-ass name for a pie.  But.  Worth it.
I mean, probably.
Technically, we are not feasting on this pie.  If we were, I would so go at it The Walking Dead style, but I've committed to two pies for the Comins Hall supper that's happening tomorrow, and doubly committed to two sugar-free pies.  My thoughts on sugar-free items are these:  if you have THE BEDES (lovingly referred to as such in my family, where one out of every one person has it), maybe pie just shouldn't be in the cards for you.  But, hey, I have food issues meself, so I know how hard it can be to JUST SAY NO (there is no DARE program for carbs.  I asked my old DARE officer.)
My hope is that these pies turn out tasty, and no one gets diarrhea (always a spell-checked word for me) because it's not made with real sugar.  This recipe was my inspiration.  I hope it looks just like that when they cut into it (hence the Russian Roulette) and my un-festive steam cuts into the top of the pie garnered the teen-killer moniker.  Here we go:

For the filling:

3 cups blueberries (I used frozen)
1/2 cup sugar-free maple syrup
4 cups blueberries (frozen again)
1/2 cup sugar-free maple syrup
4 Tbsp quick cooking tapioca (have fun finding a use for the rest of the box you have to buy to get your measly 1/4 c....)
1 Tbsp lemon juice
1/4 tsp nutmeg
1/4 tsp salt

1 recipe double crust pie dough (I use this recipe)

Simmer the 3 cups of blueberries and 1/2 cup syrup until it reduces by half (about 20 minutes.)  Add this, along with the 4 cups of blueberries and the rest of the ingredients to a large bowl and combine.  Allow to cool completely.

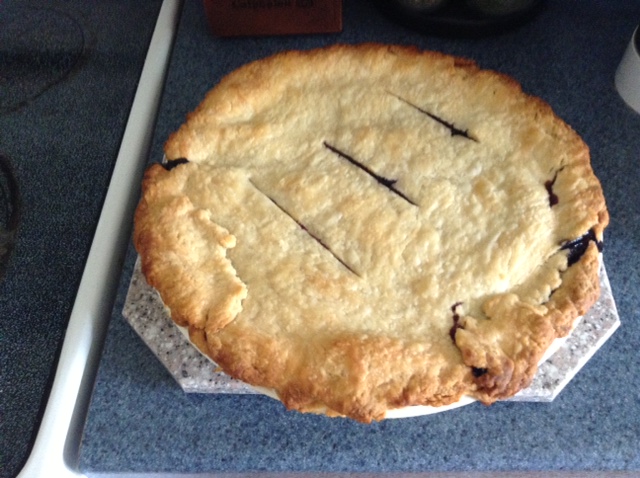
Make the dough.  Or use store bought.  Or take some dough that you made last time from the freezer and allow it to thaw.  Dough up your pie plate and add your filling.  Top it off and put it in the fridge for 30 minutes.  Meanwhile, pre-heat your oven to 450 and put a foil-lined cookie sheet on the bottom rack of the oven.  Now, the actual recipe dictates that after the 30 minutes of fridge chill, turn your oven to 400 and bake for 30 minutes, then brush with cream and sprinkle with sugar and allow to cook for another 30 minutes.  Here's how my recipe goes:  Preheat your oven to 450.  After 20 minutes, remember that you have to put the cookie sheet in the oven, too.  Open the oven, keep it open too long adjusting the racks for the cookie sheet, then set off the smoke detector, which probably won't wake up the husband who just came home from night shift at all.  Throw the smoke detector onto the back porch, then gingerly set the pie into the oven.  Forget to turn the oven down to 400 degrees until it's been cooking for 20 minutes.  Then, turn the oven down, and don't bother with the sprinkling of sugar or brushing of cream.  Finish reading Jen Lancster's new book while your blueberry pie browns nakedly in the oven.  With 20 minutes left, take pity on the pie and throw a double thickness of foil lazily over the top to prevent more browning.  Take out and cool completely before serving.

Good thing is, you can still take pictures of it while it's warm.

The only nightmare on Elm St. would be if you ate two pieces of this, you may get the runs...
If you don't have to go sugar-free because of THE BEDES, you can use regular maple syrup.  Shoot up with your favorite flavor of insulin and dig in!

Sunday, May 12, 2013

Gram's Lasagna

My grandmother's lasagna has a hundred variations.  Just within our family.  My uncle Steve will swear (literally) up and down that she used ricotta (she didn't.)  Some family members boil the noodles first; others just rely on no-boil noodles (I am an Other.)  Sometimes there are pepperoni guest stars; oftentimes, it's just good ol' hamburg.  It's always a memory of her, if not quite exactly how she made it.  She'd just be glad she didn't have to make it. 

Because we are getting together today to celebrate all the mothers in our family (here, there, past, and future) and I am designated to make one of the lasagnas that will be gracing the table today, I am going to share our recipe.  Some of you non-family have had it.  It's the only lasagna I will ever have fond feelings for.  All other lasagna is not my gram's lasagna

Everything this recipe is eyeballed.  I'm using a Pampered Chef stoneware lasagna pan, so I will do my best to fill it up.  A Pyrex 9x13 can be used, too, but it might not take as much for ingredients.

Here we go:

Gram's Lasagna
2-3 lbs hamburger
2-3 bricks of cream cheese (I usually use the Neufchatel Cheese, because no one is going to notice)
1-2 packages noodles (no boil, or boil-first...cook's choice)
2-4 jars sauce (I always use Newman's Own...but the flavor is always a roulette...today I'm using his Marinara, but Sockarooni is always a delicious fallback.  I ended up using about 2 1/2 for this lasagna )
Pepperoni
4 c. mozarella
Shredded parm for the top (optional...I thought I had some in the fridge, but we used it all up...all I had was Shaky Green.  This is not acceptable Parm for lasagna.)

Heat oven to 375.  Decide on the amount of hamburger you think you'll need (I know, how can you know?  I picked a little over 2 lbs.  Cross your fingers) and brown in a large skillet, adding seasonings (salt, pepper, garlic powder, etc, as you'd like.)  Depending on the fat content of your hamburger, you may need to drain off the fat.  Do that.  Then add your bricks of cream cheese (our default ratio is 1 brick per 1 lb of hamburger...I used two.  Delicious!) and stir until the cream cheese is melted.  Now it's time for assembly.

If you're using a glass pan, you may want to spray it beforehand with non-stick.  I used the stoneware pan, so I was spray-free.

1. Put down some sauce
2. Layer of noodles (I used the Barilla brand no-boil, 3 pieces per layer)
3. Sauce (no-boil noodles need lots of sauce.  Lots.  If it seems like too much, it's the right amount.)
4.  Mozarella and Pepperoni
5.  Noodles
6.  Sauce
7.  All the hamburger.  Yes, a 2 lb layer of hamburger cream cheese divinity.  I did try dividing it in half, but it looked sparse.  And we are not a sparse people.
8.  Noodles
9.  Sauce
10.  Mozarella and Pepperoni
11.  Noodles
12.  Sauce
13.  Mozarella

Then, get a sheet of tin foil and spray one side with non-stick spray.  Cover the lasagna (spray side down) and cook for 50 minutes covered, then remove the foil and cook for another 10 minutes or so, until the cheese starts to brown.
I know, it doesn't look any different than anyone else's lasagna...but I can't very well cut into it to show you the center, because uncle Steve would beat me with my own arms if the lasagna arrived at his house misshapen in any way.  So this is an invitation for you to just make this yourself.  Embrace the cream cheese.  Embrace the fact that it's better two, three, four days after it's made.  Use it to trap a non-committal boyfriend (I used cookies, but that was the first date...I was Girl Scout Prepared for that meeting.)  Use it to create warmth with a neighbor.  A new mother.  A slew of hungry siblings. 

Happy Mother's Day!


Wednesday, April 10, 2013

Let My Supper Go

'Round about Wednesday I get sick to death of making dinner.  Hows about you?  You get out of work late, traffic is trafficky, you live way out in the willywacks, et cetera, et cetera.  Pizza and chinese food always sound better than having to think of what to do with a pound of hamburger (or hamburg, if you live out in these parts.)

Then you remember that the man of Shannon's dreams (presumably) has given you a bottle of his homemade maple syrup.  And while you yourself cannot identify a maple tree, you can identify a Canadian, and Mrs. Butterworth, and you know that pancakes will become dinner tonight, if only to try Moses' maple syrup.

(Can you tell yet that I'm writing this post on a post-syrup syrup high?  Cause I totally AM!)

What is doubly awesome is that the recipe I'm going to share is not for Moses' homemade maple syrup, cause I'm pretty sure you just tap a few maples and boil that crap down, and that's pretty easy.  But so is this recipe.  It's PW's recipe for Edna Mae's Sour Cream Pancakes.

I know.  Brake squeal.  Sour cream?  But guys, it's good.  They're light, and sorta like a moist/creamy type deal.  Andrew commented on how moist they were (the more I write moist, the more I hate the word), and it wasn't until he had eaten every last bite (asparagus-free, mind you) that I told him there was 7 Tablespoons of flour in the entire recipe, and it was primarily sour cream.

So pretend it's low-carb as you're suffocating them to death with Hannaford brand butter flavored maple syrup product, or some of Moses' syrup, if you know him well enough, bub.

PW's original recipe is here, or on page 76 of her first cookbook.

Here we go:

1 cup Sour Cream
7 Tablespoons All-purpose Flour
2 Tablespoons Sugar
1 teaspoon Baking Soda
1/2 teaspoon Salt
2 whole Large Eggs
1/2 teaspoon Vanilla Extract
Butter, For Frying And Serving (baby steps!  I only ate mine with 10 gallons of syrup!)
Warm Syrup, For Serving (Ain't nobody got time for that!  Is this phrased overused?  I was just starting to get into it...)

Put your sour cream into a medium sized bowl.  Add the dry ingredients and stir until barely combined.  Whisk up the eggs and vanilla in a separate lil bowl and add to the sour cream mix, and stir until just combined.  Be gentle.  Heat up a skillet (I used my cast-iron) to medium low heat, add butter, and fry up pancakes in 1/4 c servings.  Flip after 2 minutes or so, when they look set and they're starting to give you bubbles at the surface.  Cook for another couple minutes.  Repeat with remaining batter.

That was the entire recipe (minus one still in the pan)

Serve with whatever you eat on your pancakes.  I had intended to make blueberry pancakes, but was at Motivation Level Zero to stop at a real grocery store (I hit the Tradewinds in the village for sour cream.  Alas, no blueberries there.)  I was tempted to put in some sausage crumbles I had at the house.  When I mentioned this after the fact to Andrew, he gave the half shrug of, "yeah, I'd eat that."  Yeah, and ya'd eat asparagus, too, ya numbah.

Husband portion.  Minus two.  I also got the one in the pan.  Score!


Tuesday, April 9, 2013

Con-Artist Cooking

We had asparagus on Easter.  I'm copacetic to asparagus.  Sure, the next day I nearly have a heart attack when I go to the bathroom and I'm quite sure I'm dying (what is in asparagus that gives your wee the death factor??), and sure, it's not a starchy vegetable, so it's like a red-headed step-child to me, but I wouldn't pass it by on a buffet line.
But Andrew would.
He did take a no-thank-you bite of it on Resurrection Sunday (which is more than he did when I made split-pea soup that week with the hambone...), but he didn't go back for any thank-you bites.
So tonight I did what any good wife (or mother of a toddler) would do...I hid the asparagus.  Casserole-style.
And he gobbled it up.
Because his eyes don't know what his belly like.
His belly like asparagus.
I hid it in this easy, nothing-really-homemade-about-it casserole.

Here we go:

3 chicken breasts, cut up into small chunks
Olive oil
1 red pepper, diced
1 lb asparagus (how you gonna hide 1 pound of asparagus from someone?  Cut it in half and let them assume it's green beans.  Suckahs!)
1 box Cavatappi (fantastic note:  when I tried to spell-check Cavatappi, the alternative word was "catnapping.")  Penne or any other shapey pasta could work, too.
2 containers of Philadelphia Cooking Creme (I used the Italian Cheese and Herb)
Italian blend cheese (handful...that's what I had left in our cheese drawer)

Heat large non-stick skillet to medium heat.  Add a swirl or two of olive oil.  Add chicken chunks and brown.  When the chicken is almost done, add the diced red pepper and asparagus (I cut off the ends of the asparagus, but you can just hold the tip end and break off the end-end and it will naturally break off the tough part.  That is the worst explanation of how to trim asparagus ever.  Look it up online...I'm sure it's more coherent.)  Cook until the veggies are a little soft...you still want some crisp to them, but not a raw-veggie taste.  Add one container of cooking creme and stir to combine.
While the chicken is cooking, cook your pasta according to the package directions.  Drain and return to your cooking pot.  Add the chicken mixture to the pasta, along with the other container of cooking creme, and stir to combine.  Pour into a 9x13 pan, cover with a handful of the Italian blend cheese, and broil (I set my broiler to low and put my oven rack on the 2nd to last spot) until the cheese is brown in spots and it starts to look like Pizza Hut takeout.
He was picking asparagus from the dish to eat on purpose!

Serve with Hannaford's finest garlic bread.  Don't serve with the leftover salad your asparagus-loving husband has claimed for his lunch the next day.

Try sneaking in veggies that your family doesn't typically eat.  Cut up small enough, doused in sauce and cheese, and tucked behind some twirly pasta, they won't even notice.  It's con-artist cooking at its finest!

Sunday, April 7, 2013

I Like Big Puffs and I Cannot Lie

Breakfast during the week at our house is usually some toast or a bagel thin (that's my pre-workout breakfast...to be followed by a second breakfast at work.)  Weekend breakfasts aren't usually any more involved...maybe eggs...or maybe I pout and Andrew takes me to breakfast.
But I was feeling cookery this morning, and I whipped up the PW's French Breakfast Puffs.
Ermergerd.
They are a delicious, butter dipped, cinnamon sugar coated cross between muffin and doughnut.  They're about a difficult to make as chocolate chip cookies, meaning, anyone can do this.  It gets a little messy at the end, when they get their butter and cinnamon sugar bath, but it's totally worth it.
PW's original recipe can be found here or on page 66 of her first cookbook.  Her recipe is below, with my remarks in italics.

Here we go!

3 cups Flour
3 teaspoons Baking Powder
1 teaspoon Salt
1/2 teaspoon Ground Nutmeg (I went heavy-handed with the nutmeg, cause I like 'em spicy...so maybe 3/4 tsp??)
1 cup Sugar
2/3 cups Shortening
2 whole Eggs
1 cup Milk
1-1/2 cup Sugar
3 teaspoons Cinnamon
2 sticks Butter (the panicked look on Andrew's face when I told him the recipe called for 2 sticks of butter...you should have seen it!  I was able to use about a stick, plus two or so tablespoons.)

Preheat oven to 350 degrees. Lightly grease 12 muffin cups. (I sprayed em down with non-stick spray.)
In a large bowl stir together flour, baking powder, salt, and nutmeg. Set aside.
In a different bowl, cream together 1 cup sugar and shortening. Then add eggs and mix again. Add flour mixture and milk alternately to creamed mixture, beating well after each addition. (I used my Kitchen Aid...just like making cookies, I tell ya!)
Fill prepared muffin cups 2/3 full. Bake at 350 degrees for 20-25 minutes or until golden. (Mine took closer to 30 minutes...just watch em.)
Naked Puffs

In a bowl, melt 2 sticks butter. In a separate bowl combine remaining sugar and cinnamon. Dip baked muffins in butter, coating thoroughly, then coat with cinnamon-sugar mixture.
I didn't eat three, I swear!  I just thought to take the picture while my hands were clean, melting more butter...
 Serve warm.  Entice your mother to come down for puffs, instead of driving all the way into town to the Bagel Shop. 
The humanity!
You can freeze any remaining puffs.  Then your husband won't have any food guilt.

Saturday, March 30, 2013

Spicy Pulled Pork


This is the face of the man I love eating PW's Spicy Pulled Pork.  What you don't see is that he was finishing his second sandwich.  What you don't see is that for lunch today, we finished up the rest of the pulled pork.  What you don't see is that he had two more sandwiches, and finished up the leftovers in the container.  THAT'S how good this pulled pork is.  And it's so easy.  PW's recipe calls for a 5-7 pound pork shoulder, but the roast I used was almost 2 pounds.  You'd be feeding the neighborhood with 7 pounds...maybe you want to do that.  I'm not really neighborly.

Here we go:

Pork shoulder (anywhere from 2-7 pounds...)
1 onion, cut into quarters
1 Tbsp chili powder
1/2 c brown sugar
4 garlic cloves, peeled
1 tsp dried oregano (I used 2 tsp accidentally...can't imagine you'd notice...more is more!)
2 tsp ground cumin
1-2 Tbsp salt, to taste (I did 2 Tbsp and I thought maybe next time 1 would be good)
Ground black pepper
3 Tbsp olive oil
2 Tbsp vinegar

In a blender or food processor, combine the onion, all the spices, olive oil, and vinegar until completely blended.  It will look like a sauce.  It is fantastic.
In a roasting pan or Dutch Oven, pour the sauce over the pork and turn it to coat.  Cover and roast 6-7 hours (my small roast took 3-4 hours) and shred.
We sauced our own sandwiches with BBQ sauce, but you could use this on pizza, nachos, soft tacos...or just eat it straight out the container.
Broccoli slaw (with homemade dressing...don't buy expensive coleslaw dressing!  DIY!) and 8 napkins, and you have yourself dinner.

Friday, March 29, 2013

Chicken Pot Pie

I grew up eating frozen chicken pot pies (I cooked them first, though.)  This pie is nice, without a bottom crust, and you can share the calories with someone you love.
I previously blogged that ain't nobody got time to make homemade pie crust.  But PW has a couple recipes for pie crust, and I was determined to do it.  This one was very easy.  With stock in shortening, you'll have an easy go-to pie crust (chuck the other one in the freezer.  Then when you want to be lazy, you can just use that one.  I call it "Multi-Tasking for the Suzy Homemaker that Would Rather Be Watching Mad Men...or Downton Abbey...or The Walking Dead.")

As for the filling, I bought a rotisserie chicken to use.  Don't bother getting the hot ones...Hannaford sells them cold in the deli section...and depending on the time of day, they can have a $1 off coupon attached.  $4.99 for a whole cooked chicken is a sweet deal.

Ok, here we go:

PW's Perfect Pie Crust and Chicken Pot Pie (original recipe found here and on page 126 in her first cookbook)

Crust:
3 c all purpose flour
1 tsp salt
1 1/2 c shortening
1 egg, slightly beaten
5 Tbsp cold water
1 Tbsp white vinegar

In a large bowl, combine flour and salt.  With a pastry cutter, gradually work the shortening into the flour for about 3 or 4 minutes until it resembles a coarse meal. In a small bowl, beat an egg with a fork and then pour it into the flour/shortening mixture. Add cold water and white vinegar. Stir together gently until all of the ingredients are incorporated.
(You can cut the dough into half or into thirds, depending on how thick or thin you'd like your crust.  I cut mine in half.)  Put the crust into the freezer until ready to use.
When you are ready to use the dough to make a crust, remove from the freezer and allow to thaw for 15 minutes. On a floured surface roll the dough, starting at the center and working your way out. (Sprinkle some flour over top of the dough if it’s a bit too moist.) If the dough is sticking to the countertop use a metal spatula and carefully scrape it up and flip it over and continue rolling until it’s about ½ inch larger in diameter than your pie pan.
With a spatula, lift the dough carefully from the surface of the counter into the pie pan. Gently press the dough against the corner of the pan. Go around the pie pan pinching and tucking the dough to make a clean edge.

Pie Filling:
3 celery stalks
3 carrots
1 large onion
1/2 stick butter
1/2 c frozen peas
2 c. cooked chicken
1/4 c flour
2 c chicken broth
1 chicken bullion cube
1/4 c. white wine (optional. I left it out.  I know, can you believe it??)
1 c heavy cream
1 tsp thyme
1 tsp salt, or more to taste
Pepper, to taste

Chop the celery, carrots, and onion into small pieces (a fine dice) and add them, plus the peas, to a large pot or Dutch oven which has the butter melted in it.  Saute until the veggies start to turn translucent.
Add the chicken and stir to combine.  Sprinkle the flour over the pot and stir to combine.  Cook for a couple of minutes, stirring gently.
Pour in the chicken broth, stirring constantly.  Stir in the bullion cube and wine (if using.)  Pour in the cream and stir to combine.  Allow the mixture to cook over low heat, thickening gradually, for about 4 minutes.  Season with thyme, salt, and pepper.
Pour filling into pie plate (I had a small tupperware container of filling mix leftover that wouldn't fit...Andrew took it the next day for lunch.  Who needs crust??)  Place crust over filling and crimp edges, or leave rustic.  However you want it to look.  Cook in a 400 oven for 30 minutes or until the crust is golden brown and the filling is bubbly (in a preemptive stroke of genius, I put a cookie sheet under the pie plate.  Was that filling bubbly!!)
I chose "rustic" crust...
Let the pie sit for 10 minutes or so, then dig in!
Milk as a side dish is completely mandatory
 

Friday, March 22, 2013

Nervous Thighs

I bought an eight-pack of boneless, skinless chicken thighs last week at Hannaford for $3.11.  Manager's Special (that's the only way I buy meat...Manager's Special, or if it has a coupon on it.) 

The thing is, thighs make me nervous.  I have two of my own and I can barely handle them.  But that buy was such a good deal...I was determined to find a way to cook them that was easy and tasted good.  I knew they wouldn't be chicken breasts, and I was just going to have to be ok with that.

After trolling the Pinterest, I found this recipe that sounded delicious, and had ingredients which I was sure I had at the house.  But the cooking directions said that the thighs would be broiled.  See, broiling makes me nervous.  The only thing I use my broil setting for is garlic bread.  What if the thighs weren't done?  What if the smoke alarm went beserk?  What if I had some more irrational worries?

I opted to cook these in the skillet, and they turned out delicious.  I didn't even need a glass of wine or a Klonapin to cook them.

Here we go:

Honey Glazed Spicy Chicken Thighs

4 skinless, boneless chicken thighs
2 teaspoons garlic powder
2 teaspoons chili powder
1 teaspoon salt
1 teaspoon ground cumin
1 teaspoon paprika
1/2 teaspoon ground red pepper (I used McCormick's Red Pepper Shot, because that's what I had.  I was going to opt for red pepper flakes, cause I had that, too.  Use what you like or what you have.)
Olive oil
6 tablespoons honey
2 teaspoons vinegar

In a large bowl or large ziplock bag, combine the spices.  Add chicken thighs and toss to coat.  Heat non-stick skillet with olive oil and add the chicken thighs.  While the chicken thighs are cooking, mix the honey and vinegar (I eyeballed the honey because measuring honey is a pain...)  Once the thighs are cooked through, add the honey mixutre.  It will bubble and get all delicious.  See below.
Underestimated the size of my pan...so one little thigh got cooked by its lonesome...and then was tossed into the leftover sauce


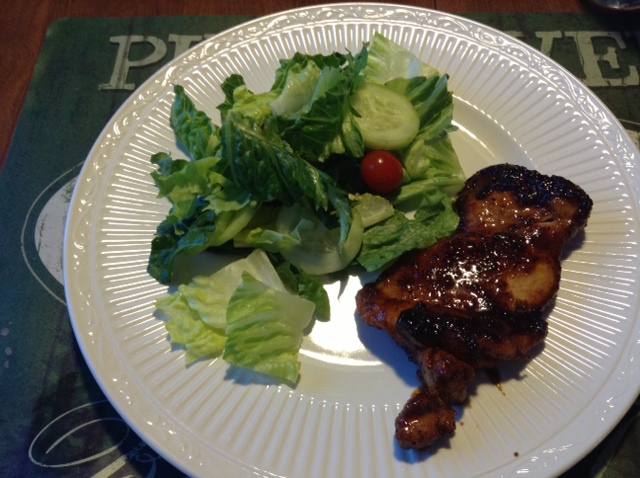
Shannon and I feasted on this and salad, then tucked into Season 2 of Downton Abbey.  Andrew had a piece once he got home.  All votes were in favor of thighs.

I will never show you how much Ranch dressing I put on my salad to make it edible


Tuesday, March 19, 2013

PW and Angie

The Pioneer Woman is my obsession.  Partly because she cooks like weight gain isn't a side effect.  Partly because she gets to stay home and cook and rear (REAR!) her children.  Partly because she's married to a cowboy (Andrew is nothing to scoff at, but I don't know if he'd ever wear a cowboy hat for me.)  I don't get the cable, so I've only managed to catch her show once, but I've been an obedient follower of her website, and thanks to my generous m-i-l, I used my Christmas gift card to buy both of her cookbooks.  Now, seeing as I already own one mile of cookbooks, I was determined to make something of these books.  More than just show.  Put them to use!  (Also, putting my cookbook holder to use...it's hard to cook from a hardbound cookbook, y'all.)  So my plan is to cook through (or nearly through) both of her cookbooks.  Tonight, we start with her recipe for Scalloped/Au Gratin potatoes.  You can find her original recipe here, or if you have her new cookbook, it's on page 226.  Original recipe pasted below is from PW's website...italicized words are my own.

PW's Scalloped/Au Gratin Potatoes

4 whole Russet Potatoes, Scrubbed Clean (this makes so much!!!!)
2 Tablespoons Butter, Softened (I didn't use all the tablespoons...maybe 1/2-1 tbsp)
1-1/2 cup Heavy Cream 
1/2 cup Whole Milk 
2 Tablespoons Flour 
4 cloves Garlic, Finely Minced (the cookbook only calls for 3, so I used that and it was perfect for us)
1 teaspoon Salt 
Freshly Ground Pepper, to taste 
1 cup Sharp Cheddar Cheese, Freshly Grated (I used 2 cups, unfreshly grated, because more is more)


Preheat oven to 400 degrees.
Smear softened butter all over the bottom of a baking dish. (I used a 9x13 glass pyrex dish.)
Slice potatoes, then cut slices into fourths. (For future makings, I would cut the potatoes down smaller.  They cooked okay in fourths...I think it's just a psychological thing that I wanted the chunks to be smaller.  You could also dust off your mandolin and make paper thin slices.  Don't have a mandolin?  You can borrow mine.  But you'll have to dust it off yourself.)
In a separate bowl, whisk together cream, milk, flour, minced garlic, salt, and plenty of freshly ground black pepper.
Place 1/3 of the potatoes in the bottom of the baking dish. Pour 1/3 of the cream mixture over the potatoes.
Repeat this two more times, ending with the cream mixture. (The cookbook directions just have you chuck the potatoes in the dish and pour the cream mix over the potatoes.  That's how I did it.  I always favor lazy over more work.)
 Cover with foil and bake for 30 minutes. Remove foil and bake for 20 minutes, or until potatoes are golden brown and really bubbling. (I stirred up the potatoes that were on top because they weren't swimming in the delicious scallop/gratin sauce and I wanted to make sure they got their bath.)
Add grated cheese to the top of the potatoes and bake for 3 to 5 more minutes, until cheese is melted and bubbly.
Allow to stand for a few minutes before serving by the spoonful. Delicious! (Agreed!)

Potatoes are in the upper right corner, in case you mistook it for the salad